Photoshop December 18, 2018
Posted by Maxwell Kaeser in Photoshop.Tags: Photoshop
add a comment
For my second station I decided to do a Photoshop project which while not being entirely new is something that I have always enjoyed.
The fact that Photoshop is such a popular and widely used program in tech classes learning something new came tricky however I was able to learn something new as well as try something I hadn’t done in a while.
The most important thing that I can talk about is the Art History Brush tool which creates a strange but rather visually pleasing blurred image which gives it the appearance of a painting. To use this tool go to the History Brush located above the eraser tool. Once you find that, right click on the tool to see a menu where a second option, the Art History Brush tool, appear. Before using this make sure of a couple things, if the image is original do not touch anything or this won’t work correctly, if you have and edited image you would like to use this on make sure you have everything right and then save it as a JPEG. After saving as a JPEG reopen the JPEG, not the PSD if available, then use the tool. Screw around with it to get the effect you want it creates a really interesting aesthetic.
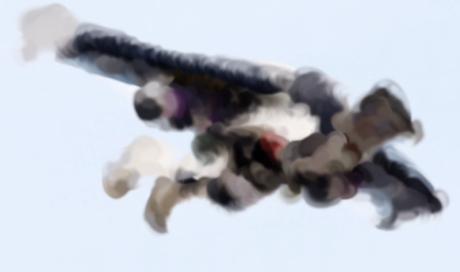
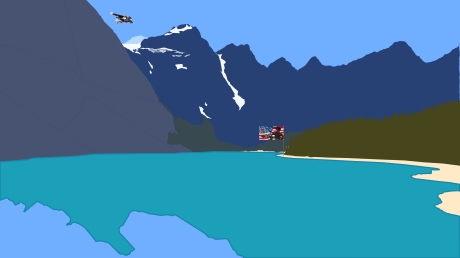
When it came to my final I put this and another one of my practices together with a completely new animated mountain scene which I created by outlining sections with different colors like water, snow, trees, rocks, etc. to create a final that I was happy with.
Photoshop October 22, 2018
Posted by Taylor Ann Lee in Photoshop.add a comment
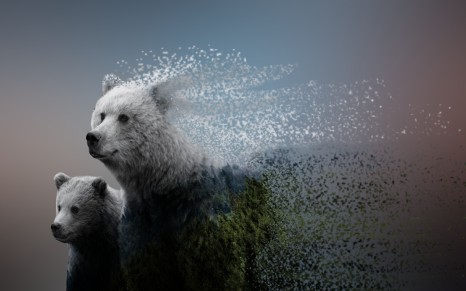
For my first station I chose to do Photoshop. My goal for this project was to combine a bunch of effects and make a wallpaper for a Chromebook. I started out watching Photoshop videos and decided on using the double exposure and decay effect. If either of these effects interest you I believe the most important things I learned were how to get a detailed outline of an object in an image, and how to get a black layer mask which were key to getting the decay effect right. To get a good outline of an object you can use the magnetic lasso or the quick select tool, if you are short on time, the outline then becomes a silhouette for the double exposure. In one of the videos the artist decided to go to channels, make a copy of the darkest channel, fills the entire section of what he wanted to select black, and then he used the quick select tool. (You should be able to watch this in the double exposure video below). Doing this technique helps you to get a more detailed outline, especially if you are working with hairs. I will note, there are a lot of ways to accomplish the same thing in photoshop, the technique you use completely depends on the image you choose. Another important thing to keep in mind, that I struggled with, was that when doing the decay effect the layer mask needs to be black for the liquify filter to work for the purpose of the decay. You do this by holding down ALT while you click on the “create a mask” button on the bottom right of photoshop. The most important thing with photoshop is knowing the tools, I did this by following along to tutorials and watching photoshop videos, because you can see exactly how artists are creating the effect which allowed me to figure out how photoshop works and learn techniques to create my final. (I would highly suggest doing this)
Videos to watch:
Smoke Effect: https://www.instructables.com/id/Photoshop-smoke-tutorial/
Double exposure: https://www.youtube.com/watch?v=Mbf-QXCCXgM
Decay effect: https://www.youtube.com/watch?v=Vfz0hDdYl0A
Creative Photoshop- May 30, 2017
Posted by kylarys in Photoshop, Uncategorized.add a comment
For my semester long station, I chose to learn more about photo shop. I wanted to go more in depth with Photoshop to better my editing skills, which will help me with my photography. This was not my first time doing Photoshop, however I was really interested in learning more about lighting and blending specifically. For my final project, I decided to combine some of the many techniques I learned into one image. I picked several images and put them together using the skew, mask, gradient, brushes, linear dodge and more tools. I created my own image by combining several and blending the lighting to look more realistic. If I were to do this again, I would plan more time for my final so that I could’ve used my own images. This would have made me think about the edit more creatively and incorporated my photography. I did make several edits with my own images, but for the final I used internet images. My advice for this station is to use the official Adobe Photoshop website because it provides some basic, but super helpful tutorials. Though lots of tools are self explanatory, I learned about some new ones that are more useful and sometimes hidden. Patience and attention to close detail are necessary for this station. I would also recommend learning about the perspective and skew tools before anything else, as they were really useful for changing a scene and getting things to look more natural. Overall I really enjoyed learning about Photoshop and what it has to offer.

Lukas C. Photoshop (TRIGGER WARNING) May 30, 2017
Posted by lukascrew in Photoshop.add a comment


This is my Photoshop project. I personally think there was no major challenge to the project. The tools were easy enough to learn on their own, if not there was twenty thousand tutorials online for it. I think the hardest part would have been understanding graphic design principals to make something look interesting. If there are any recommendations to students who are about to do this as a project, it is get familiar with the tools by playing around with them, what’s the worst that could go wrong.
Cydney Hurlbert Photoshop blog post April 27, 2017
Posted by cihurlbert in Photoshop.add a comment
During my Photoshop station, I learned a lot. Although at times it was frustrating getting the image to do what I wanted, it always worked out in the end. In the beginning i found it difficult to resize an image. In order to solve this problem I looked it up and found this helpful link https://helpx.adobe.com/photoshop/how-to/resize-image.html. On my next project I didn’t know where to start, so I looked up Photoshop tutorials, and I had an idea. In order to add contrast in the eyes I had to look it up, and I found this tutorial http://www.photoshopessentials.com/photo-editing/lighten-eyes/. I then wanted to add a filter, but I had no idea how so I once again looked it up, and found this very helpful website https://helpx.adobe.com/photoshop/using/filter-basics.htm. Although at times this station got frustrating the final project always look well done, and professional.
Zach Nelson Photoshop April 13, 2017
Posted by zdnelson20 in Photoshop, Uncategorized.add a comment
For my second station in tech lab I decided to do Photoshop. I chose Photoshop because it is something I have used before but before I learned very basic things. so this time around I wanted to expand my knowledge of Photoshop and do more complex things. So one thing I wanted to learn is how too put text on a picture. So I ended up finding a you tuber that had what I was looking for and a lot more. This you tuber, Blue Lightning TV Photoshop, has very detailed videos and helps you a lot. I highly recommend this you tuber but only if you have used Photoshop before. He works with very complex stuff so you have to be familiar with Photoshop to use this you tuber as a resource. For my final project I decided to take what I learned from is text n a portrait video and combine it with my filtering skills. So what I did was take a picture of Bob Marley and put text on it a put the typical green yellow red filter on it. I ended up being really happy with the end result. I also really enjoyed Photoshop and its something that I wish I could do for a longer period of time because there is just so much you can do with it. 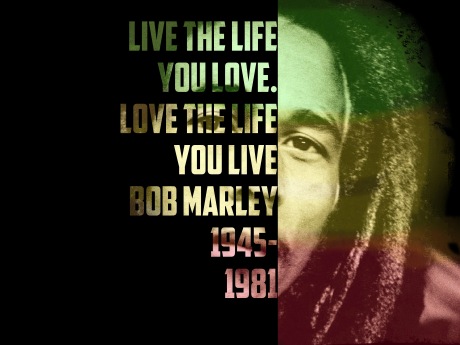
Photoshop March 22, 2017
Posted by Jonny Lunney in Photoshop, Uncategorized.add a comment
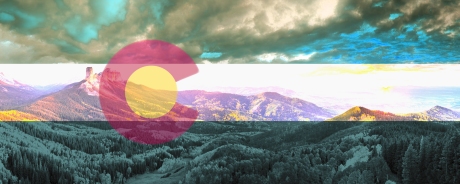
I chose Photoshop because it looked very fun and easy to learn and it is valuable to know how to use in real life to make banners and other types of advertisement. For my station, I was inspired to make something that had a lot to do with where I live so I chose a cool sunset picture in Telluride and made my own custom transparent flag to overlay it. In Photoshop, I learned lots like selecting layers via cut and copy and rasterizing layers.
Photoshop March 21, 2017
Posted by lmholcroft in Photoshop.add a comment
For my second station I started with basic easy skills in Photoshop such as transferring photos I would recommend doing this so you can begin to see how the program works before you begin doing more complicated edits. Due to the large amount of tools available on Photoshop you can create practically anything if you know what tools to utilize. To makes this easier I recommend using the Photoshop folder inside the Tech lab folder in google drive this was the best resource I found and I used it through out the entire station. Also I found this website which helped me a lot with learning the basics and I would recommend visiting this if you have not used Photoshop before . Both of the resources outline a few different tools and what you can do with them. From the skills I gained on those few tools I used them for different edits combining different effects to create something new. The part of this station that I struggle with the most was the inspiration and ideas on what to create since there are so many different possibilities. However I found that if you just google Photoshop photos it provides so many ideas that you can adapt into your own , I found this website particularly helpful in helping me come up with ideas and create the effect. I would recommend this station because of the freedom to create anything you want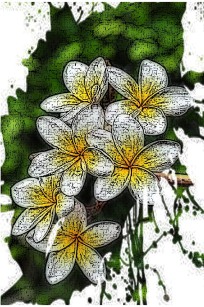 .
.
Photoshop March 13, 2017
Posted by isaaceland in Photoshop.add a comment
For my second station I did Photoshop.
My suggestion to people who aren’t familiar with Photoshop should watch this tutorial, https://www.youtube.com/watch?v=xS5uh5TCXcU. when using Photoshop, it is fine to mess up because you can always “step backward” or pretty much the undo button. Also the magnetic lasso tool is very helpful in making an image’s background translucent. Also the color picker tool and the paintbrush help a lot if you need to get rid of some white spots, and add outlines. Overall this was a very fun station.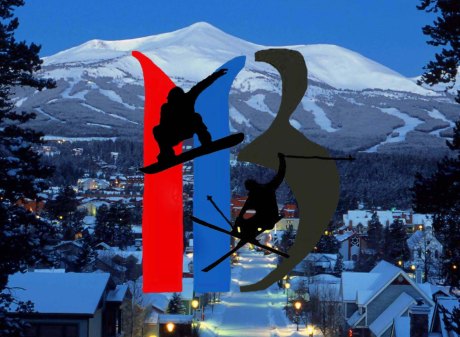
Photoshop Katerina Lee Station 1 March 10, 2017
Posted by catsrgreat2001 in Photoshop.add a comment
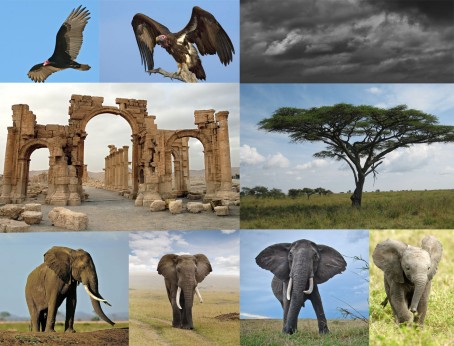
For my first station I decided to do Photoshop. My final project was a collage of national parks I have been to, to be used as a computer or other device screen. I think it turned out very well and I am well able to use it. My suggestions for anyone interested in Photoshop would be to experiment. Don’t worry about ruining your picture because there is a fantastic “step backwards” option. There are some amazing Photoshop features that you won’t find unless you just click around. I highly recommend using the lasso tools they are amazing for inserting pictures into your image and are extremely helpful. 

You must be logged in to post a comment.